Chapter 4 shows an alternative way to plot a course or determine a bearing, using the Compass Rose. Every Chart has at least one compass rose, showing the chart variation printed near the center of the Rose.
The inner ring of the compass rose shows Magnetic direction. The outer ring shows True direction.
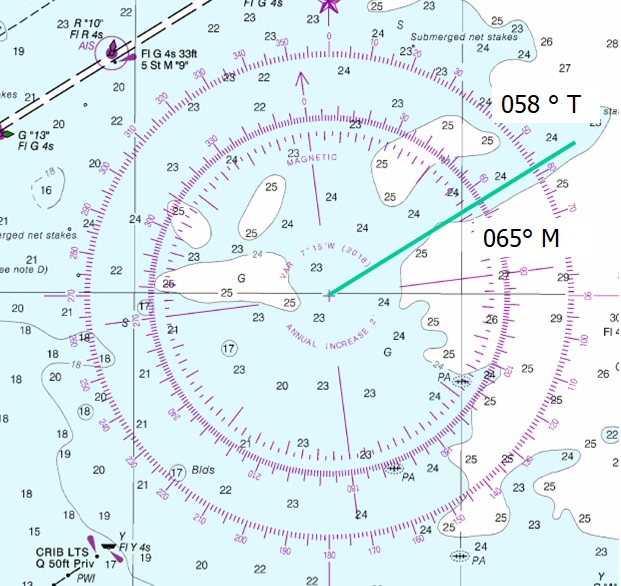
Place a straight edge on the center of the rose, and draw a line through the center and the rings. This will show both the True and the Magnetic direction of that line.
For example, the green line below, which passes through the center of the Rose, crosses the inner "Magnetic" ring at 065°M, and the outer "True" ring at 058°T. Note that the variation is printed near the center of the rose - 7° 15' W.
Akron Sail and Power Squadron - Marine Navigation Class
Chapter 4
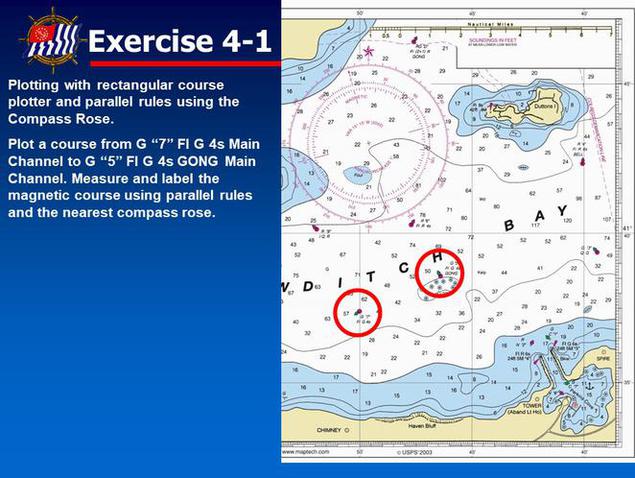
Place the edge of the parallel rules on the course line. Draw the course line
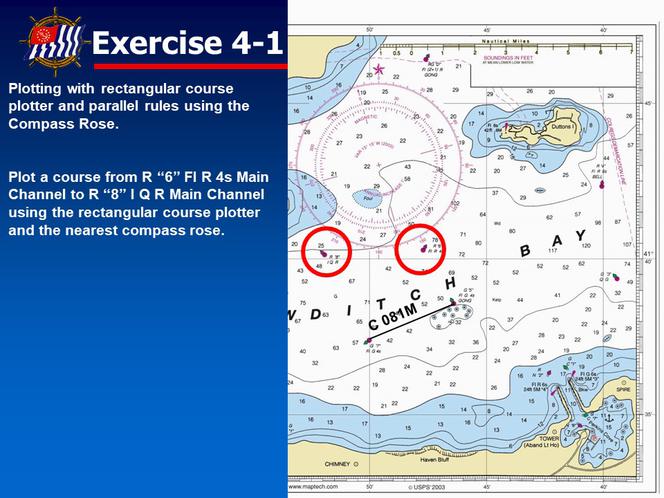
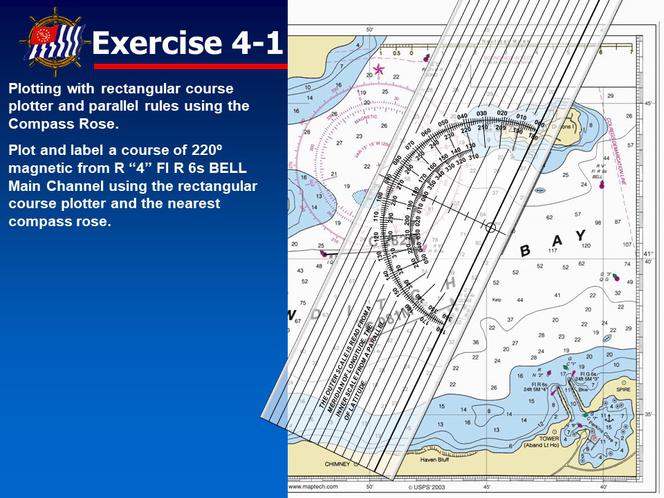
Exercise 4-1
Exercise 4-1 shows how to use this technique.
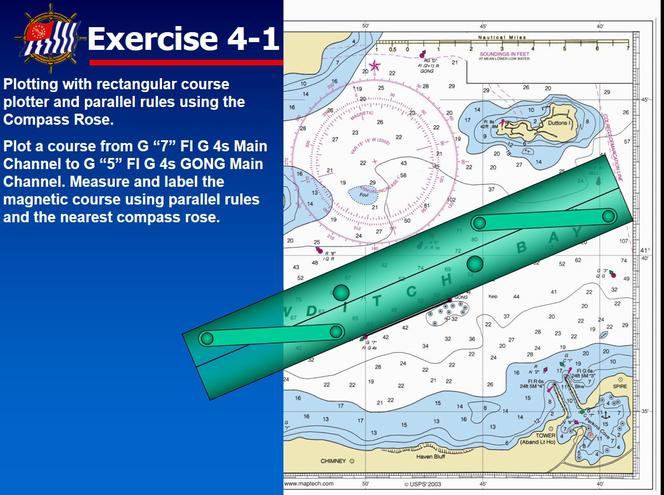
Swing the upper arm of the parallel rule to the center of the compass rose. In this case, the compass rose was fairly close to the course line. If the compass rose was farther away, you would "walk" the parallel rules, one arm at a time, so that you would reach the compass rose.
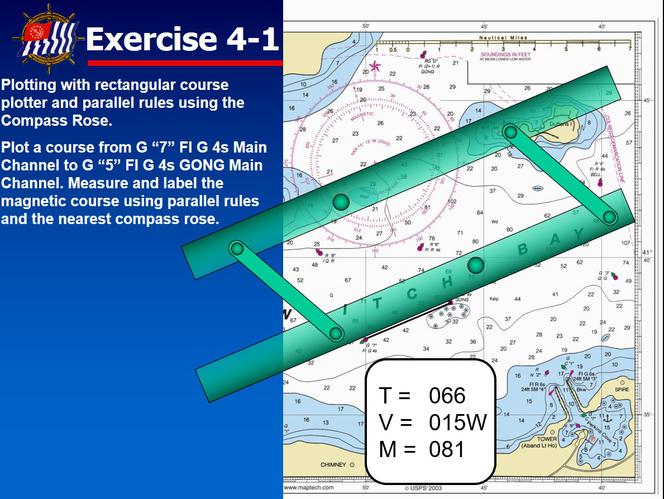
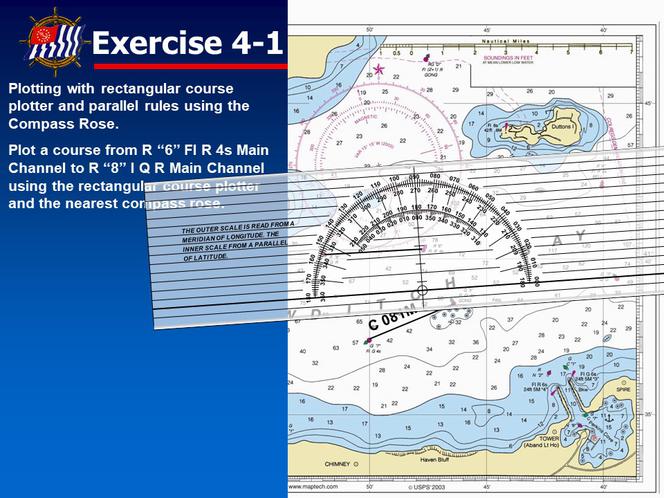
In this case, you can read the True course from the outer ring, of 066°T. You can read the magnetic course of 081°. You will label the course line "C 081 M"
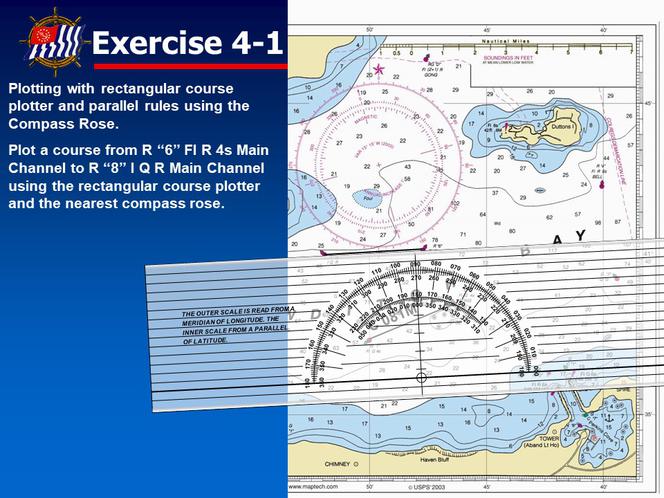
Place the edge of the course plotter on the course line. Draw the course line
Slide the upper edge of the course plotter to where it passes through the center of the compass rose, using your "eyeball" to assure the horizontal lines on the plotter remain parallel to the course line.
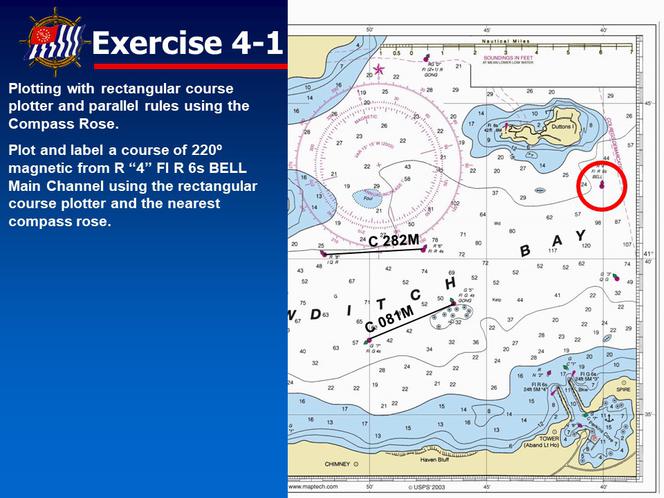
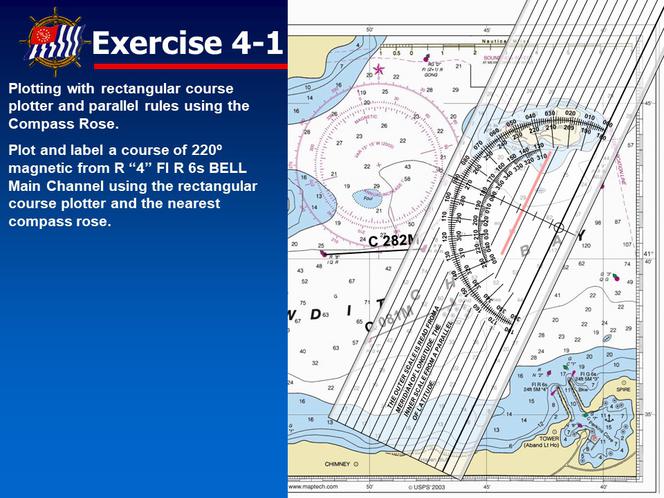
You can read the True course from the outer ring, of 267°T. You can read the magnetic course from the inner ring as 282°. You will label the course line "C 282 M"
Place the upper edge of the course plotter to where it passes through the center of the compass rose. Line that edge so it also passes through 220 on the inner compass rose. The course plotter is now placed on a course of 220M.
Draw a "construction line" along lower edge of the course plotter. This line is also on a bearing of 220 M. You will use this construction line as a guide as you slide the lower edge of the course plotter to R "4" Fl R 6s BELL. Use your "eyeball" to assure the horizontal lines on the plotter remain parallel to the construction line, assuring that a bearing of 220M is maintained.
Slide the lower edge of the course plotter to R "4" Fl R 6s BELL. Use your "eyeball" to assure the horizontal lines on the plotter remain parallel to the construction line, assuring that a bearing of 220M is maintained. In the drawing above, the construction line is shown in red. Once the new course line is drawn from R "4" and labeled with the course, "C 220 M", the construction line can be erased.